Happy Black Friday everyone! In honor of not having to go out shopping at 1 AM for a 40" TV I strolled into Target this afternoon at 3 PM and snagged a full 5 doll Gloom beach set on sale for 43 bucks. It was the last in store and the paint on all of them is kind of fucked up so hurray I'm going to wipe them all anyway! In any case, I thought actually laying down a straight up tutorial on how I do a faceup might be helpful. I'm pretty much totally self taught and between watching Jamie paint and Youtube videos I kind of worked out a method.
Here's who we started with. A CAM kit Vampire girl. No gross hair to rip out so that was kind of a bonus. However...personally...I think the fangs are kind of wonky and the arched eyebrows don't do it for me. She's got these pointed ears which are kind of neat and an interesting face shape. I think there is potential here.

Step one: Remove the makeup. I default to Winsor & Newton Brush Cleaner (and restorer) and Magic Eraser. Dunk the eraser in some of the cleaner and go to town. It smells kind of hideous and it also has this gross kind of after-texture but it works like a charm to get the paint off fast. Rubbing alcohol I believe also works but you have to scrub like a fiend. After you get the paint off, wash the head in soap and water. If any of the cleaner is stuck to the head, the paint is gonna melt so it's important to get off. Also, wash your hands too. I've accidentally left some on my hands and totally taken out an eyebrow I was working on before. Stuff is potent. With luck, the finished product will look something like the girl below.

Now that she's been wiped, you have to seal the doll first before you put any paint or pastel or anything on. This keeps your materials from staining the actual plastic of the doll, and also it gives the plastic bits some kind of tooth so that the chalk pastels will stick to them. Always always always wear a respirator (I loan mine out to friends who don't have one when we hang out because I care about lungs) and spray outside. Holding your breath doesn't work cause something something tiny partials science and the end result is like cancer. Really. I can't stress this one enough, if you do faceups, you want one of these.
Another hint? Don't spray when it's raining. The stuff gets all gunky if the humidity is too high. You can use Mr. Super Clear for a sealant, if you can get it easily. I can't and I didn't track any down online so I use Testors Dullcoat, which you can get at Michaels craft stores for like 6 bucks or something. Purity Coat I think is another that has been said it's ok to use buuuuut Jamie used this one and it melted her Monster High doll so honestly, I'd stick with Testers or MSC.

(For all of these pictures my betta fish Porkchop will be hanging out in the background because my work table happens to be the table where I keep my fish only they were there first so they get to be in the pictures. Also they're too heavy to move.) So once I seal the first initial coat, I usually leave the doll to dry for like 15-30 minutes. Honestly it's probably closer to an hour cause what I usually do is hop online and surf the internet or play video games until I remember I am supposed to be painting and then I go back and work. In any case, let it dry for a few.
Then with watercolor pencils I like to roughly draw out what eye shape and eyebrow shape I want. This is honestly harder than it would seem as you can tell by my messed up line work. I draw the right half of the face better. The left generally blows. I either turn the doll upside down to work on the left side, or draw the left side first, get it to where I like it, and then draw the right to match. But with watercolor pencils the bonus is you can wipe the lines you don't want away with water (or spit...ew). You can always use a kneaded rubber eraser to erase the lines (again you can grab those at Michaels except they were out of them when I went to pick one up so I had to buy a whole pencil kit I'm never going to use just for the eraser. Then I found mine in a laundry basket. It was awkward).
I use Prisma watercolor pencils in a case because honestly they were the only ones I could find and because they were only like 16 bucks. For what I use them for, they work great. There's no white, which is sad, but the rest of the colors so far I've actually used all of them. You want to get a good hand sharpener too because you need one hell of a fine point if your hand shakes, which mine do really bad, and I've had nothing but problems with electric ones. I usually get the little metal sharpeners that they sell basically next to any drawing supplies in any art store but in a pinch I've used the cheap plastic school supply ones too. Just not as nice.

Next step, blush. I got a set of 24 Faber-Castell chalk pastels. Chalk, not oil, trust me. Then I usually grab a plastic plate, take an exacto knife, and scrape off a small amount of whatever colors I want. For this I did three different shades of red, a brown-ish one, a light gray, a charcoal gray, and a black. I almost always pick more colors than I actually use, but when you scrape off only a little bit the damn pastels seem to last forever so it's ok.
The first thing I usually lay down is the blush color. She's a vampire so I figured, eh, maybe her last meal was recent so she should have some nice red cheeks. I have a big, soft, round brush I use only for cheek blush and one that I specifically bought for that. I went into the store, felt up all the brushes like a weirdo, and picked the one that I thought would work on my face because it was soft enough. Then I gently dab it into a bit of the chalk pastel that I want to use for the blush color, tap it off (I don't like heavy blush), and sweep it down across from the point of the cheek down to about halfway to the mouth. Sometimes I go above the point of the cheek too, but just a bit. I don't want her to look like a hooker but I do want blush cause it gives more of an illusion of shading and three dimensions.
IF you happen to put down a color and decide you totally hate it and it makes her look like a street walker, worry not. You can actually take your kneaded eraser and erase that crap off her face with it. For darker colors you might also need to wet a Magic Eraser with just water and rub it off but for light pastels you can totally erase them. This is also a pretty helpful hint if you want to get fine edges or get rid of some fallout from the blush that landed somewhere you didn't want.
Next, is lips. Lips are weird. Lips take practice. And MH dolls are kind of weird cause they don't have this completely defined upper lip so really you can kind of paint the shape how you want it to be. I start with the bottom lip in a shade of red I THINK might work. Usually then I hate it, erase it, and start the lips over. Once I get the correct shade for the bottom of the lip via trial and error and swearing, I go one shade DARKER on top. Cause of how the light generally hits a normal human face, your top lip is darker than your bottom one. Since I'm trying to mimic a human...ish face, I stick by that rule. I also define the top lip with the little cupid's bow to how I want it. This vampire chick has a pretty defined indent but the actual points of her top lip are pretty round. However, because the sculpt isn't that defined, you could make them super pointy if you wanted. You could actually probably even get rid of the whole cupid's bow if you wanted and give her full lips without any indent. It's pretty open here, so feel free to play around.
Then, I try to lay down my basic eyeshadow. Secretly, I'm like the worst girly girl and I don't really know anything about makeup. What I did for absolutely seriousness was went on youtube, looked up a tutorial for smokey eye makeup on humans, and practiced that shit on myself until I decided I looked halfway decent. Then I do the same thing on dolls. Basically, I like to start with a light over layer, a very light gray from the inner corner of the eye to the outer in this case. Then I do the OUTER corner of the eye next, the cateye bit. I did it in black this time cause, eh, smokey eye makeup. But you can do it in lots of other colors too, just generally the idea is you want the lightest color to be at the inner corner of the eye and your darkest color at the outer corner. Then, with the middle color, you blend them together. And sometimes it takes some layers, you might not be dark enough so you add more black to the outside. Or it's too dark so you had to add some white or very light gray to the inner and middle parts. I do my own personal eye makeup (when I actually bother to put it on) with this exact same method.
Then I try to do a very light, thin line using the darker color on the bottom line of where I've decided the eyes should be. Like...eyeliner. Only smudgy cause it's pastel. I use it there for eye definition and cause pretty much all of my dolls aren't natural and are painted to look like they have makeup on.

Ok first layer went alright. That was laying down some basic colors and ideas. Once that's sealed and dried it's time to get finer details down. Remember the terrible eyebrow line I drew in red colored pencil no less? Well I went over it, gently, with black pastel. This would be where edging your pastel comes in handy. You can make them as thick or as thin as you want. I usually do the same brown, which is gently arched, thicker towards the nose and thinner towards the outside, no real funky shapes. Basically...I make her eyebrows look almost exactly like mine as sad as that is. I kind of wanted to give her like super bitch brows or something but decided I'm awful at that so I stuck with what I am semi-capable of doing. So once the brow pastel is laid down, I take my very sharp black (or dark brown) watercolor pencil and gently, delicately, forgetting-how-to-breathe draw some lines in. I do them longer, sweeping from the front of brow (towards the nose) to about midway through. And I don't do too many of them either, just enough to show some detail and get the idea down that yes this is an eyebrow not a cry for a tweezer intervention. I usually do only about one or two lines at the very outer part of the brow because it is so thin out there. Once that very stressful part is done, time to move back down to eyes.
I refined my eyeshadow in this second layer. More black on the outside so it was very defined but very quickly I switched to my lighter gray in the middle to smoke it out. And I used very very little pastel at the corner of her eye so that it was really extreme. Then was the hard part. I had to paint the white part of her eye, at least the first layer. So far I haven't found a good alternative to acrylic white paint and believe me if I could find one that worked as well I'd totally use it. Painting in the white is so harrowing because one screw up with the brush and you can totally set yourself back a full eye's worth of shadow and pastel. I use either a lot of acrylic retarded (that is, gel that makes it so your acrylic paint dries waaay slower and is much thinner) or water. You want to thin your paint down so that it goes on smoothly and doesn't chunk up your eye. But you want it to still be thick enough that in two or three layers you won't be able to see the plastic underneath. That's right. Two or three. Meaning as if one time wasn't bad enough, I always end up doing it a few times. To make it less awful I tend to hold my breath and keep the doll head clutched in my hand and nestled against my chest like a tiny baby bird. It doesn't make it less awful but it makes me feel slightly better about it being awful. Painting is hard, man.
Right so now that the horrifying part is done, usually I go over my lips again. Or if I wanted really really light lips, this would be when I'd lay down my only layer of color. In this case, cause the doll had this weird factory fuck-up scrape that made it look like her lip has a scar, I went a bit darker. But once that's done, it's time to seal her again and move on to what is basically my last layer (like 90% of the time anyway).

Ok so that makes two layers of pastel and then one of paint. The only time I actually haven't done this is when I've done MORE layers of pastel, like the super brightly blushed mermaid and the medusa I swear I'm working on and will totally post (someday soon I promise). Usually though, layer three is my paint. What I like to do first because it's slightly less horrifying than painting eyes is do the lashes. I do these in black watercolor pencil, which thank God can be erased. And I kind of do wispy stylized ones instead of getting super realistic. And, I totally only do the bottom layer of lashes. No idea why. I've done top lashes before but they weird me out for some reason. Usually I do the very outer corner lash first and make that my darkest, longest lash. Then I spread out four or five from there, stopping at about the middle of the eye. I try to do it lightly, and try to make the base of the lash thicker and darker than the tip. I say try cause it's freaking hard to do and takes a lot of practice. Then usually I go back between my longer main lashes and do a shorter thinner lash between them. I don't know how to draw this on a keyboard using dashes so you'll just have to use your imaginations and squint at the pictures really hard.
Then, cause I like beauty marks, I threw one or two in (it's two. It's totally two). Again, I did them in watercolor pencil. I also did her eyeliner in watercolor pencil. I don't quiiiiite go all the way to the inner corner of the eye, and I don't ever completely circle the eye by letting the top liner and bottom liner meet at the inner corner. Then I go out and let the liner get thicker as I get towards the outer corner of the eye; it's actually a pretty thick cat eye on this doll but her shadow is so dark it's hard to tell. And usually I try to make the top liner thicker than the bottom, so as to imply that she has eyelids I guess. I'm not sure. Maybe it's a style thing.
Ok. Hard part next. More painting. So it's kind of really hard NOT to make MH dolls look wall-eyed (pretty sure she's looking in two different directions as we speak). A good cheat to this? Make them look to the side. It gives them this sneaky air of mystery and flirting but it's also way way easier to ensure they don't end up looking wall-eyed. I did not do this this time. Why, I do not know. Right so in any case, I lay down in a light watercolor pencil (seriously I love them) where I think I want my irises to be. I want a half circle that just barely doesn't touch the bottom of the eye and that's about the same distance from the corners of the eyes on both sides. It's hard to wing it in paint which is why I draw it out first.
Once my circles are draw, I mix like 4 shades of whatever eyecolor I want her to have. I need a light base color, one or two middle tones, and a darker tone, all of the same damn color. Why? Cause I want her to have depth and detail in her eyes and possibly also cause I like to make this hard as shit on myself. So with a very fine very nice detail brush (I use a 10/0 spotter brush that I use for nothing else so it stays nice. At least stays nice longer...) I lay down the light color all over the inner iris. Then, while everything is still wet, I go to the outer edge and I lay down a smudge of the darkest color. And then with the middle shades, I blend that sucker in to the lighter color so that it doesn't make this hard black line (at least I try to avoid it). I usually end up throwing a lot more of the lighter color on top of everything again and try to keep it all wet enough so that it runs together and mixes instead of having harsh lines anyway.
Ok, color down. Pupil time. I try not to use solid solid dark black as my pupil. I usually water my black down a lot, or add some white to it to make it a very dark gray. Sometimes I use a very dark blue or purple on colored eyes. I'm not sure why, I just like slightly lighter pupils I guess. In any case...yeah there's basically like one shot at this to get it right. You're trying to make even small pupils smack dab in the center of her eyes. If you happen to fuck up, and I do a lot, you have to either wipe it with water and a tiny q-tip right away which can also take away the paint on your whole damn eye. Or you have to let it dry fucked up then repaint your eyes white and start over again. It's sort of a practice thing. It's a lot easier to make them small and then add a tiny amount of area to them as you like than it is to just start with big pupils. Like cooking. Easy to add. Damn near impossible to take away. (The gold dot in the paint tray at the picture is because I saw the Twilight movie and thought, I bet that'd be neat to do. It wasn't. It looked weird. Also it was sparkly. So I gave her very light gray eyes because why not?)
Ok, last step of the eyes? Highlights. You don't really have to add them I guess but I think it gives some nice detail. I have the same pattern every time. I do a dot on the left side of BOTH eyes, and then I do a line on the right side from the pupil allllll the way out of the iris to the white in a wedge shape, so it's wider on the outside. I tried to mirror the sides once. As in I did the dot on the left side of one eye, then since it was on the outside of the eye I did the dot on the right side of the other eye. Yeah it looked weird as hell. So I don't mirror, I do exactly the same pattern on BOTH eyes.

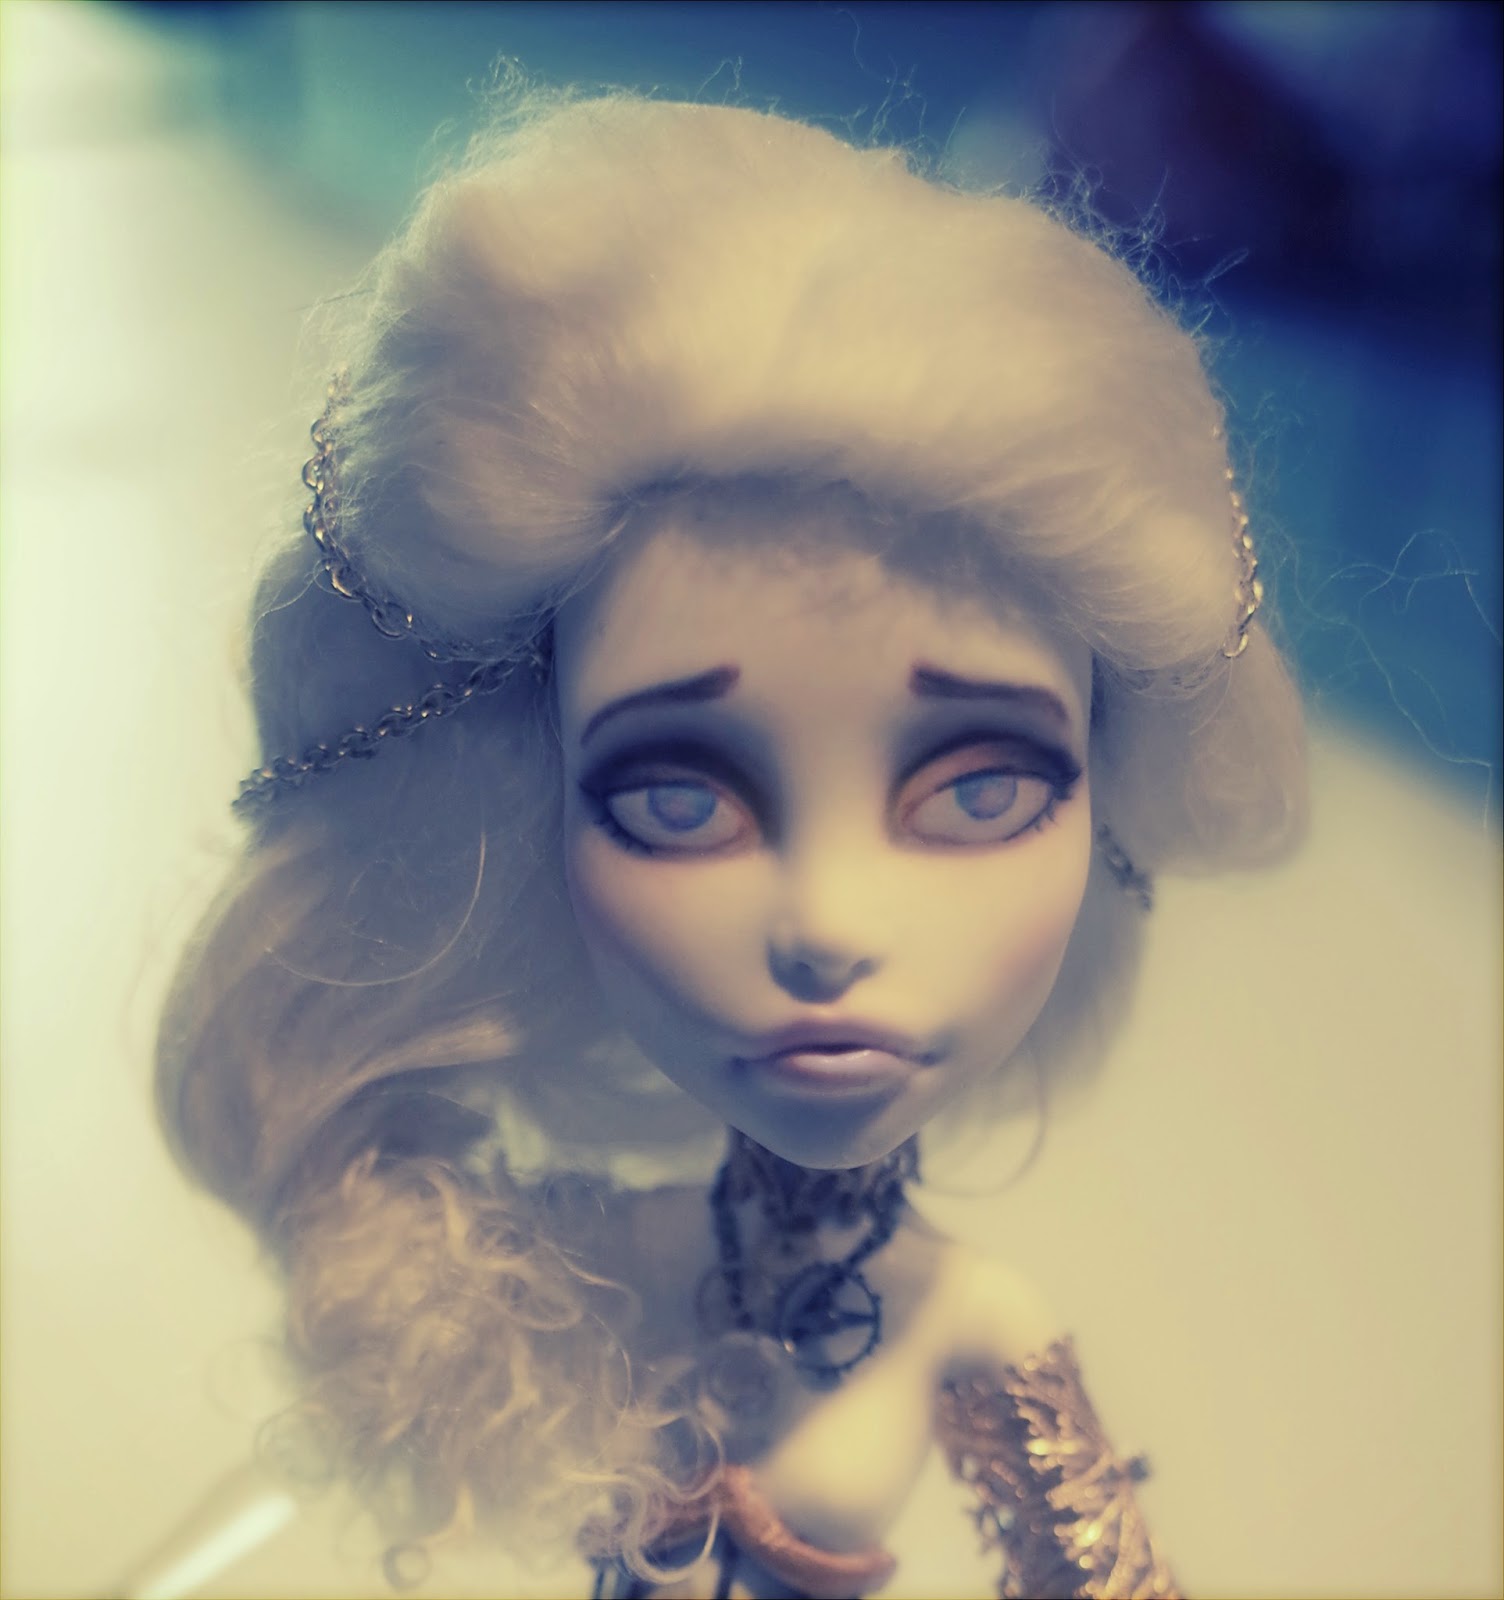
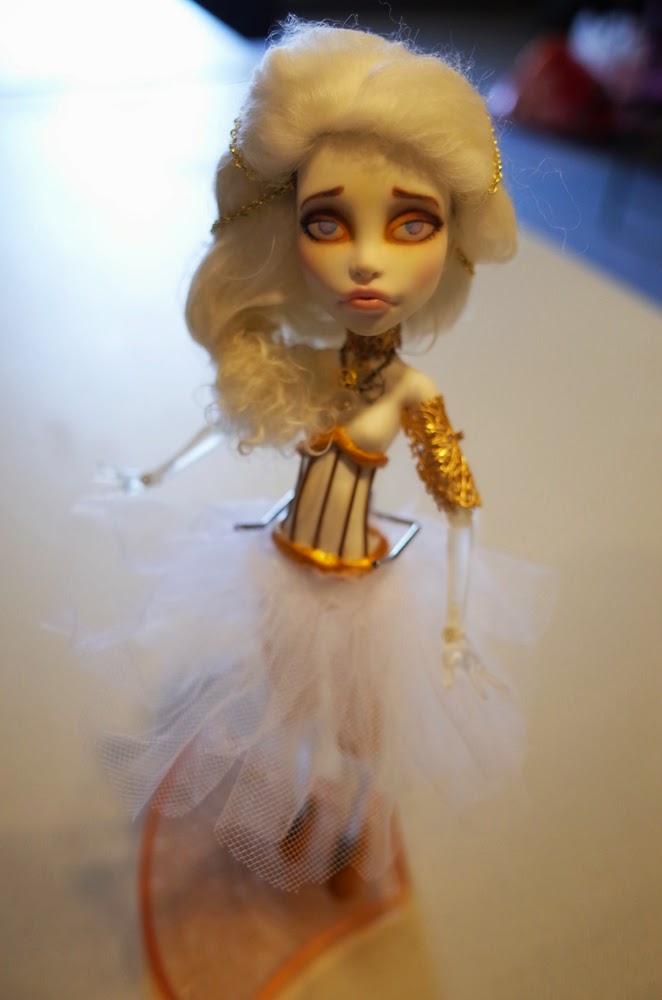
After everything is sealed, I like to take a gloss coat gel and gloss the lips, the eyes, and a tiny bit of the eyeliner. I don't gloss over the entire eyeshadow bit though because I find it looks a bit strange to me, cause generally eyeshadow is matte, unless you use glitter I guess. But once you've glossed everything, you don't have to spray over it again to seal. In fact, spraying it would dull the gloss and totally defeat the purpose of it. So once you throw gloss on her, you're done! And once you're done, you can use the tutorial to make her a wig if you like. I had red mohair and she was a pink vampire so she became a red head. So after all the pictures and all the trial and error, this is my finished project.

I actually think she came out kind of cute, considering I didn't like her default makeup really at all. But the sculpt has some cute potential. I think I'm gonna make her some fancy vampire dress and probably throw her on the Etsy shop. She's cute, but I just bought 5 more MH dolls and space is becoming a highly prized commodity.
Hopefully this was a bit of a helpful step by step explanation of my methods! A lot of it is trial and error, but luckily the best part is, if you mess up you can always try again.
Happy modding!
Sam


